Configure a Dedicated Server with Webmin
Part 02 - Webmin
01-Introduction - [[ 02-Installing Webmin ]] - 03-Configure DNS - 04-Assign Nameservers - 05-Configure SFTP - 06-Setup Web server - 07-Let's Encrypt - 08-Setup Perl/CGI PHP - 09-Manage MySQL - 10-Setup Email server - 11-Setup SASL - 12-Setup Email accounts - 13-Email process - 14-Email antivirus - 15-Usermin - 16-ExtrasWebmin is a web-based interface for system administration for Linux.
This application will help us administer easier our dedicated server.
Let's see how we can install it remotely.
Install Webmin
From the official Webmin download web page find the current:"RPM suitable for Redhat, Fedora, CentOS, SuSE or Mandrake Linux" version.
In our case is :
"http://prdownloads.sourceforge.net/webadmin/webmin-1.791-1.noarch.rpm"
Connect via SSH using PuTTY at your dedicated server.
Write :
wget http://prdownloads.sourceforge.net/webadmin/webmin-1.791-1.noarch.rpm
and hit ENTER in order to download Webmin at your server.
Now install the optional Webmin dependencies using the command :
yum -y install perl perl-Net-SSLeay openssl perl-IO-Tty
Lastly run the command :
rpm -U webmin-1.791-1.noarch.rpm
in order to install Webmin
If you have problems installing Webmin under CentOS 6.7 take a look at the official how to install documentation
Login via Webmin
Once installed Webmin you can access via web using your favourite web browser.I will use Mozilla Firefox for the entire ebook.
Write this URL at your browser :
https://111.111.111.111:10000/
Where 111.111.111.111 is your dedicated server's IP.
Pay attention at the https.
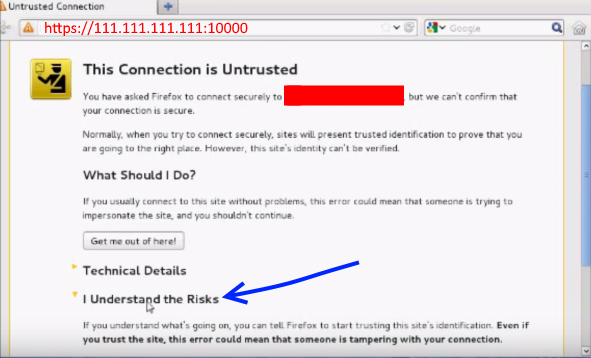
Your browser will warn you for an untrusted connection.
This warning is normal.
Hit "I understand the risks" and add this exception at your browser.
This happens because you have an secure http(s) connection but it is not certified by an Certificate Authority (CA) like Comodo, Symantec etc ...
The Webmin login screen should appear like the picture below :

Use the same Username and Password that you are using for SSH.
Example :
Username : root
Password : rootpassword
Password : rootpassword
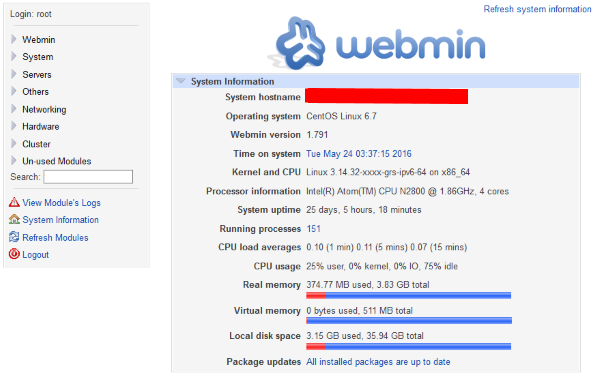
The Webmin main screen is shown below :
Configure Webmin
Now it is time to configure Webmin.First of all it is always advised to change your root password.
Your start password was given via email so it is not secure at all.
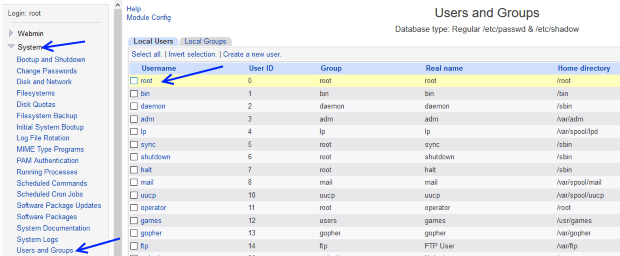
Go to System > Users and Groups
and click over root user
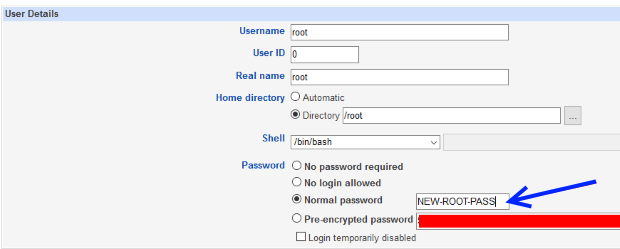
Now select the "Normal password" radio button and write your new root password.
Click the "Save" button.
By doing this procedure you have changed the password of PuTTY. Webmin will still login with the old one.
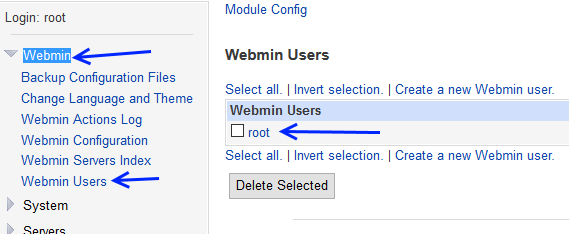
Go to Webmin > Webmin Users, and click over the "root" Webmin User.
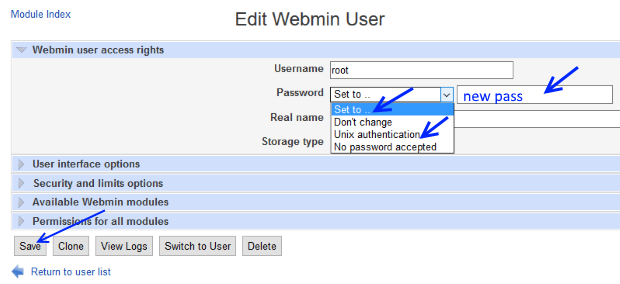
Under the voice "Webmin user access rights" go to "Password" label and select "Unix authentication" if you want that the Webmin password will be the same as the PuTTY SSH login password or simply select "Set to..." and give your new Webmin root password.
Now hit the "Save" button.
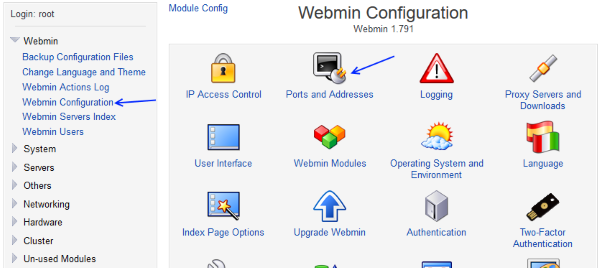
It is always a good idea to change the listening Webmin port.
Go to Webmin > Webmin Configuration > Ports and Addresses
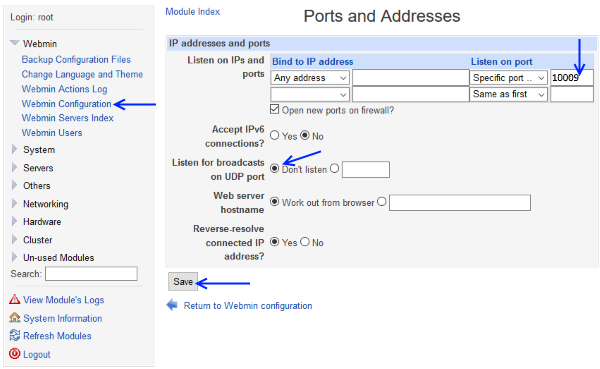
For security reasons is recommended to change the Webmin port
Listen on port : change port, for example use 10009.
Check Listen for broadcasts on UDP port : "Don't listen"
Hit the "Save" button.
Now your new Webmin access link will be :
https://111.111.111.111:10009/
Login using :
Username : root
Password : rootpassword
Password : rootpassword
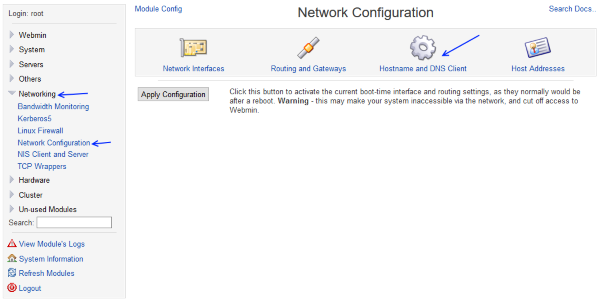
Now go to
Networking > Network Configuration.
Click over the "Hostname and DNS Client" icon.
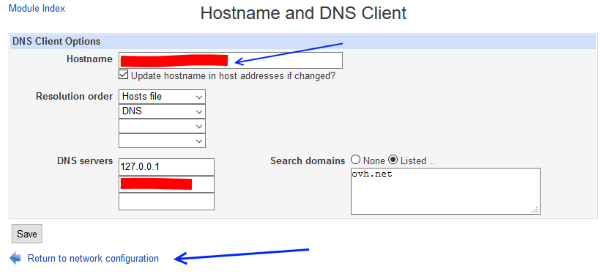
Under "DNS Clients Options" you can find your "Hostname".
I do not recommend changing your Hostname, just save it in a secure place with all your server data and click the "Return to network configuration" link.
You can also reach your Webmin using :
https://YOUR-HOSTNAME:10009/
Login using :
Username : root
Password : rootpassword
Password : rootpassword
Update System
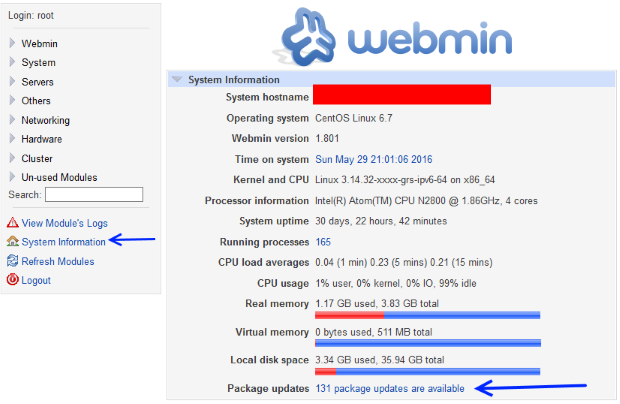
Refresh Webmin modules from "Refresh Modules" Link at the main left menu of Webmin: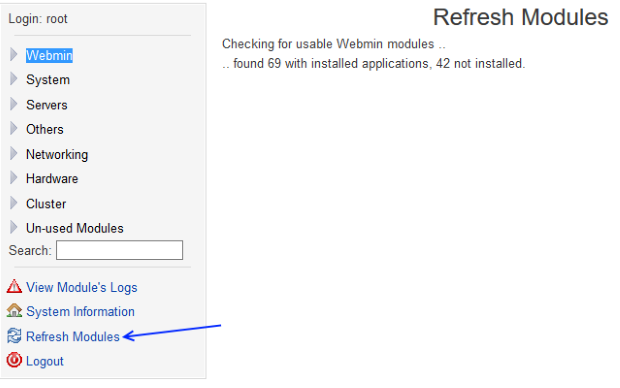
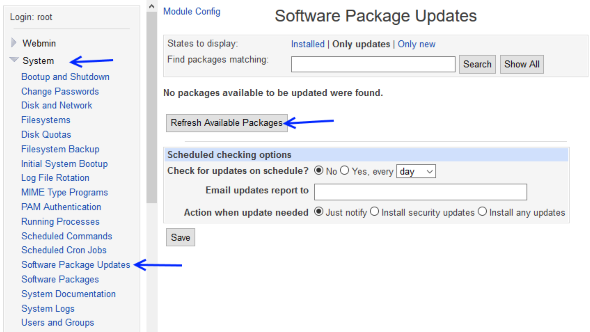
Update the hole system using Webmin by going to :
System > Software Package Updates
Hit the button "Refresh Available packages"
Also the same action can be done from the "System Information" link by clicking the "package updates are available" link".
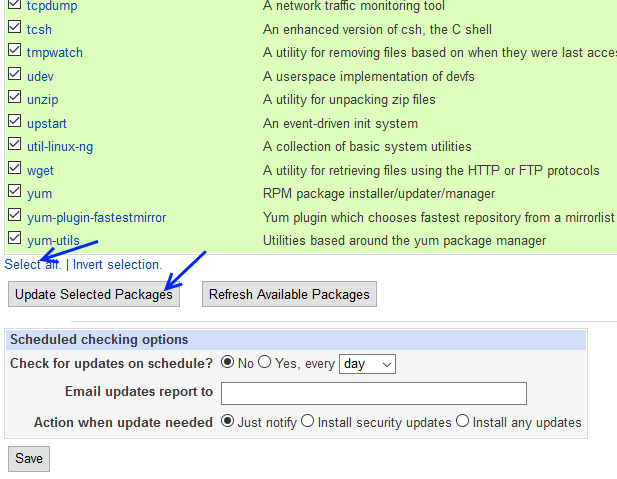
If there are updates click the "Select all" link and then press the "Update selected packages" button
We have installed and configured Webmin.
Currently you can reach and modify our dedicated server using two different options : PuTTY and Webmin.
Upgrade Webmin
Every time you log in Webmin tells you if there is a new upgrade.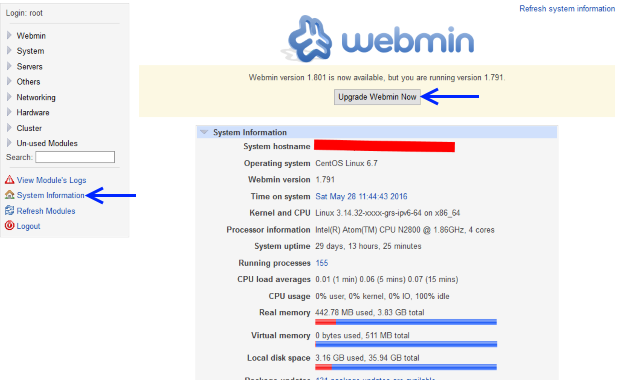
By clicking the "Upgrade Webmin Now" button just wait until all the packages are downloaded and installed at your server.
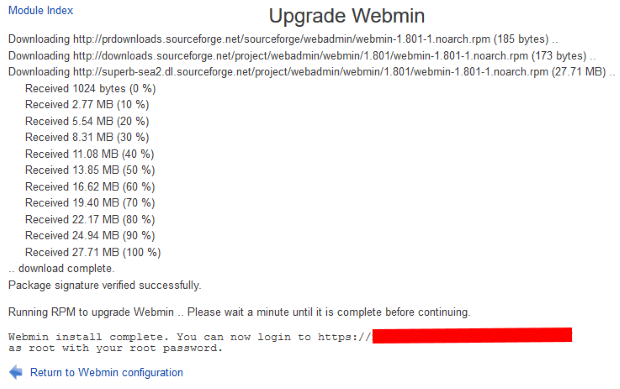
Now log out and log in again.
In the next section we will see how to configure our DNS Server called Bind.
01-Introduction - [[ 02-Installing Webmin ]] - 03-Configure DNS - 04-Assign Nameservers - 05-Configure SFTP - 06-Setup Web server - 07-Let's Encrypt - 08-Setup Perl/CGI PHP - 09-Manage MySQL - 10-Setup Email server - 11-Setup SASL - 12-Setup Email accounts - 13-Email process - 14-Email antivirus - 15-Usermin - 16-Extras